An MCP server connects your agents to an outside tool or service, such as an issue tracker or a database, so they can do more than edit files. Once a server is connected, Claude and Codex chats can both use it.
Add a server from Customize
- Select Customize in the sidebar and go to MCP servers.
- Under Browse MCP servers, select the server you want.
- Select Install. If the server needs you to sign in, select Connect and finish in your browser.
Once it's ready, select Try it on the server's details to open a new chat that uses it.
Many plugins bring their own MCP servers. A server that came with a plugin says so on its row, such as "From the acme-tools plugin", and you manage it from that plugin. Its row's ••• menu has a shortcut, such as Open the acme-tools plugin. A listed server that one of your plugins already provides shows "Installed via" and the plugin's name instead of an install button. See Add skills and plugins.
Add your own server
- In Customize, select Add custom, then Add custom MCP server….
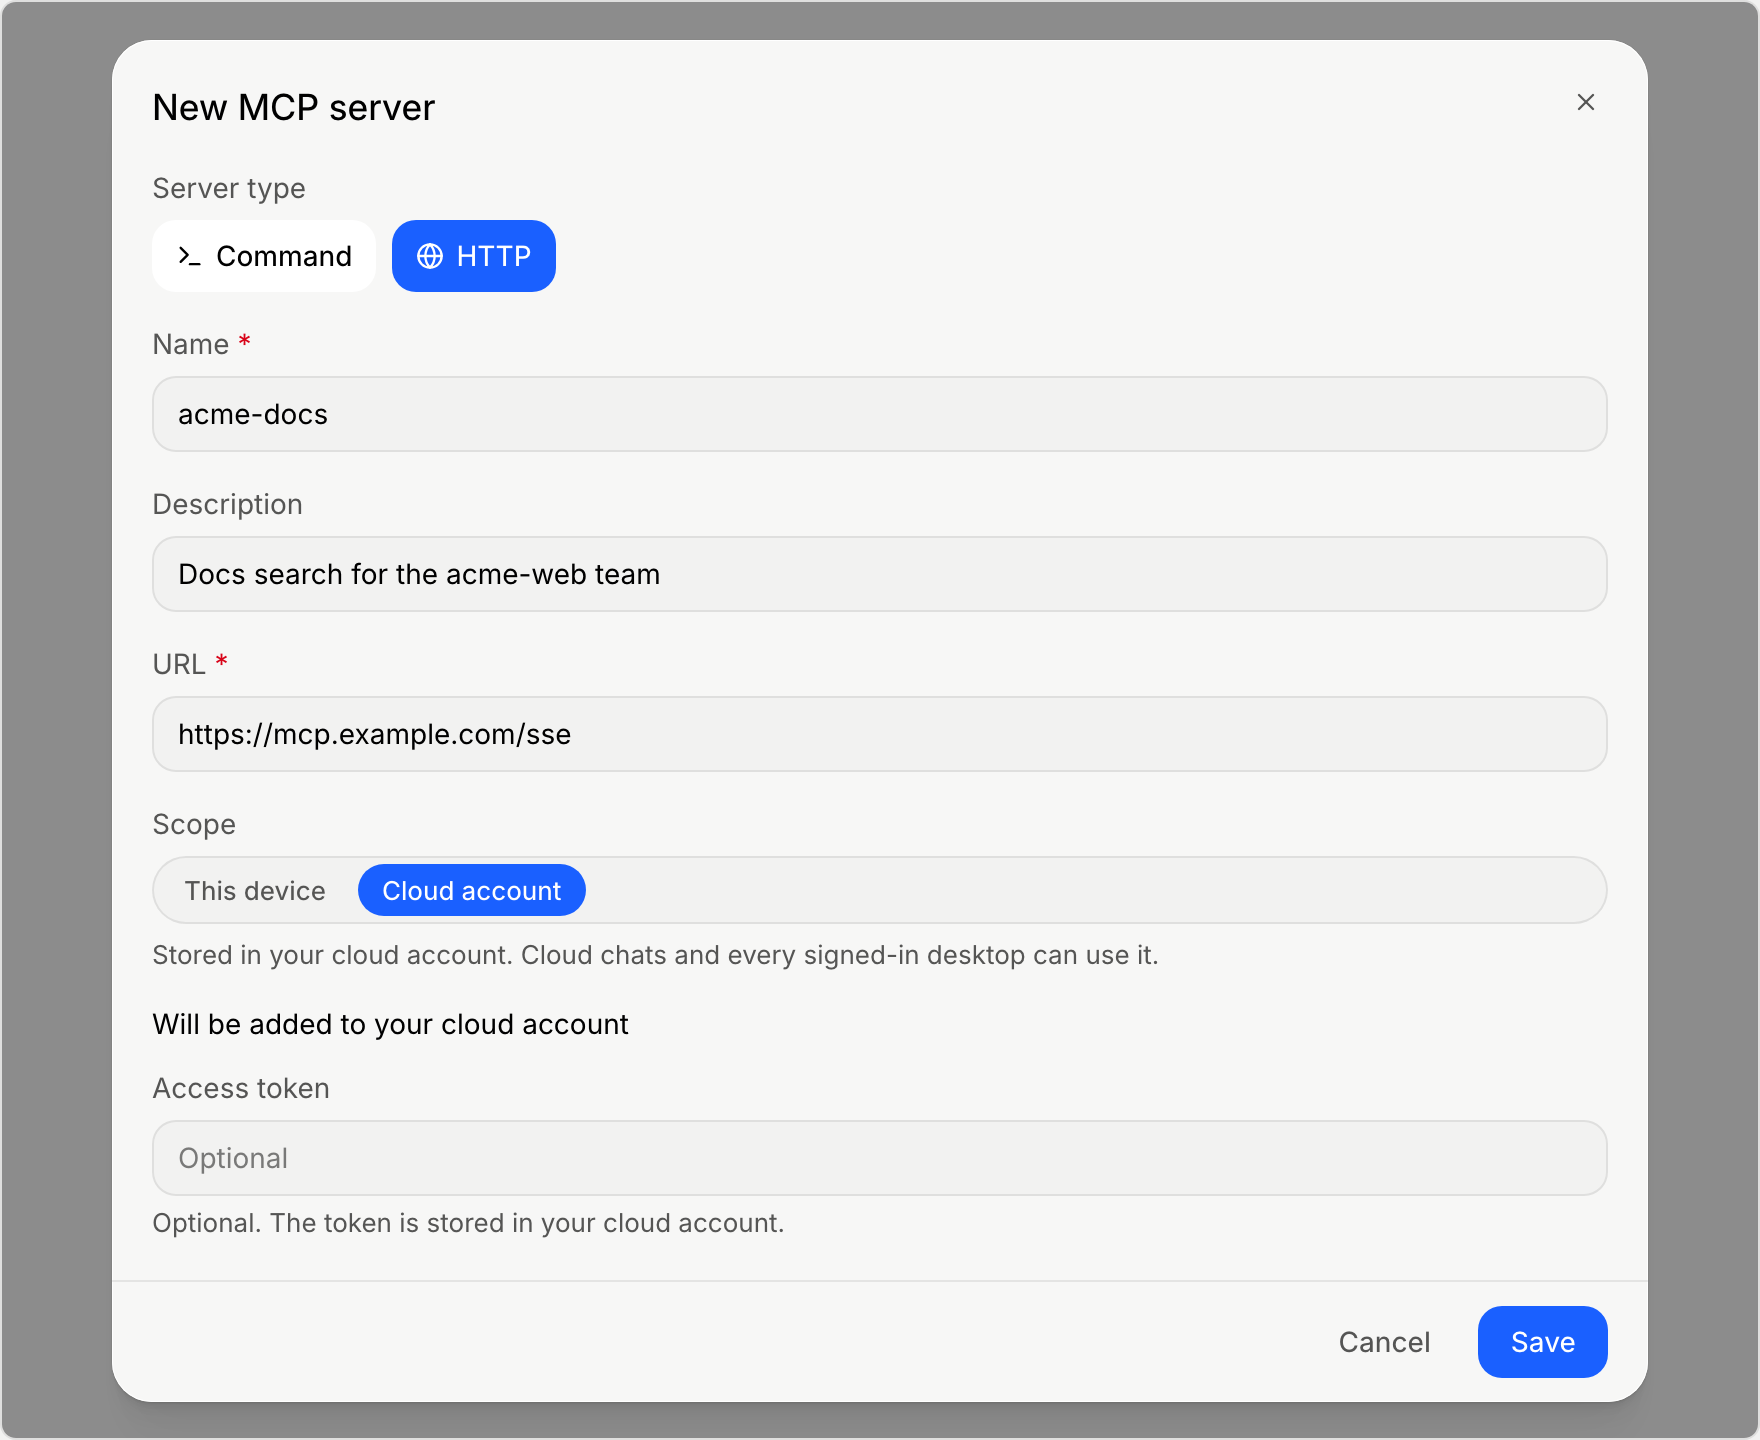
- In New MCP server, choose a Server type:
- HTTP, the default, connects to a server at a web address. Enter its URL.
- Command starts a server on your computer, such as a local tool. Enter the Command and its Arguments.
- Enter a Name, and optionally a description.
- For an HTTP server, choose where it lives under Scope:
- Cloud account saves it to your Unstoppable Code account, so cloud chats and every desktop you sign in to can use it. New HTTP servers start here when you're signed in.
- This device keeps it and its credentials on this computer.
- Select Save. If the server needs you to sign in, connect it from its details.
Command servers always run on this device.
Choose how sign-in works
Open Settings and go to MCP servers. Under HTTP MCP server auth, Default auth path sets who handles sign-in for HTTP servers on this device:
- Unstoppable Code proxy handles sign-in for you and shares one connection between Claude and Codex.
- Agent provider lets Claude and Codex each handle sign-in, so you may need to sign in to the same server twice.
- Account (via cloud) uses the connection saved to your Unstoppable Code account.
Leave it on Unstoppable Code proxy unless you already sign in through Claude or Codex directly. To set this for one server, use Auth handling in that server's settings.
Use a server on every device
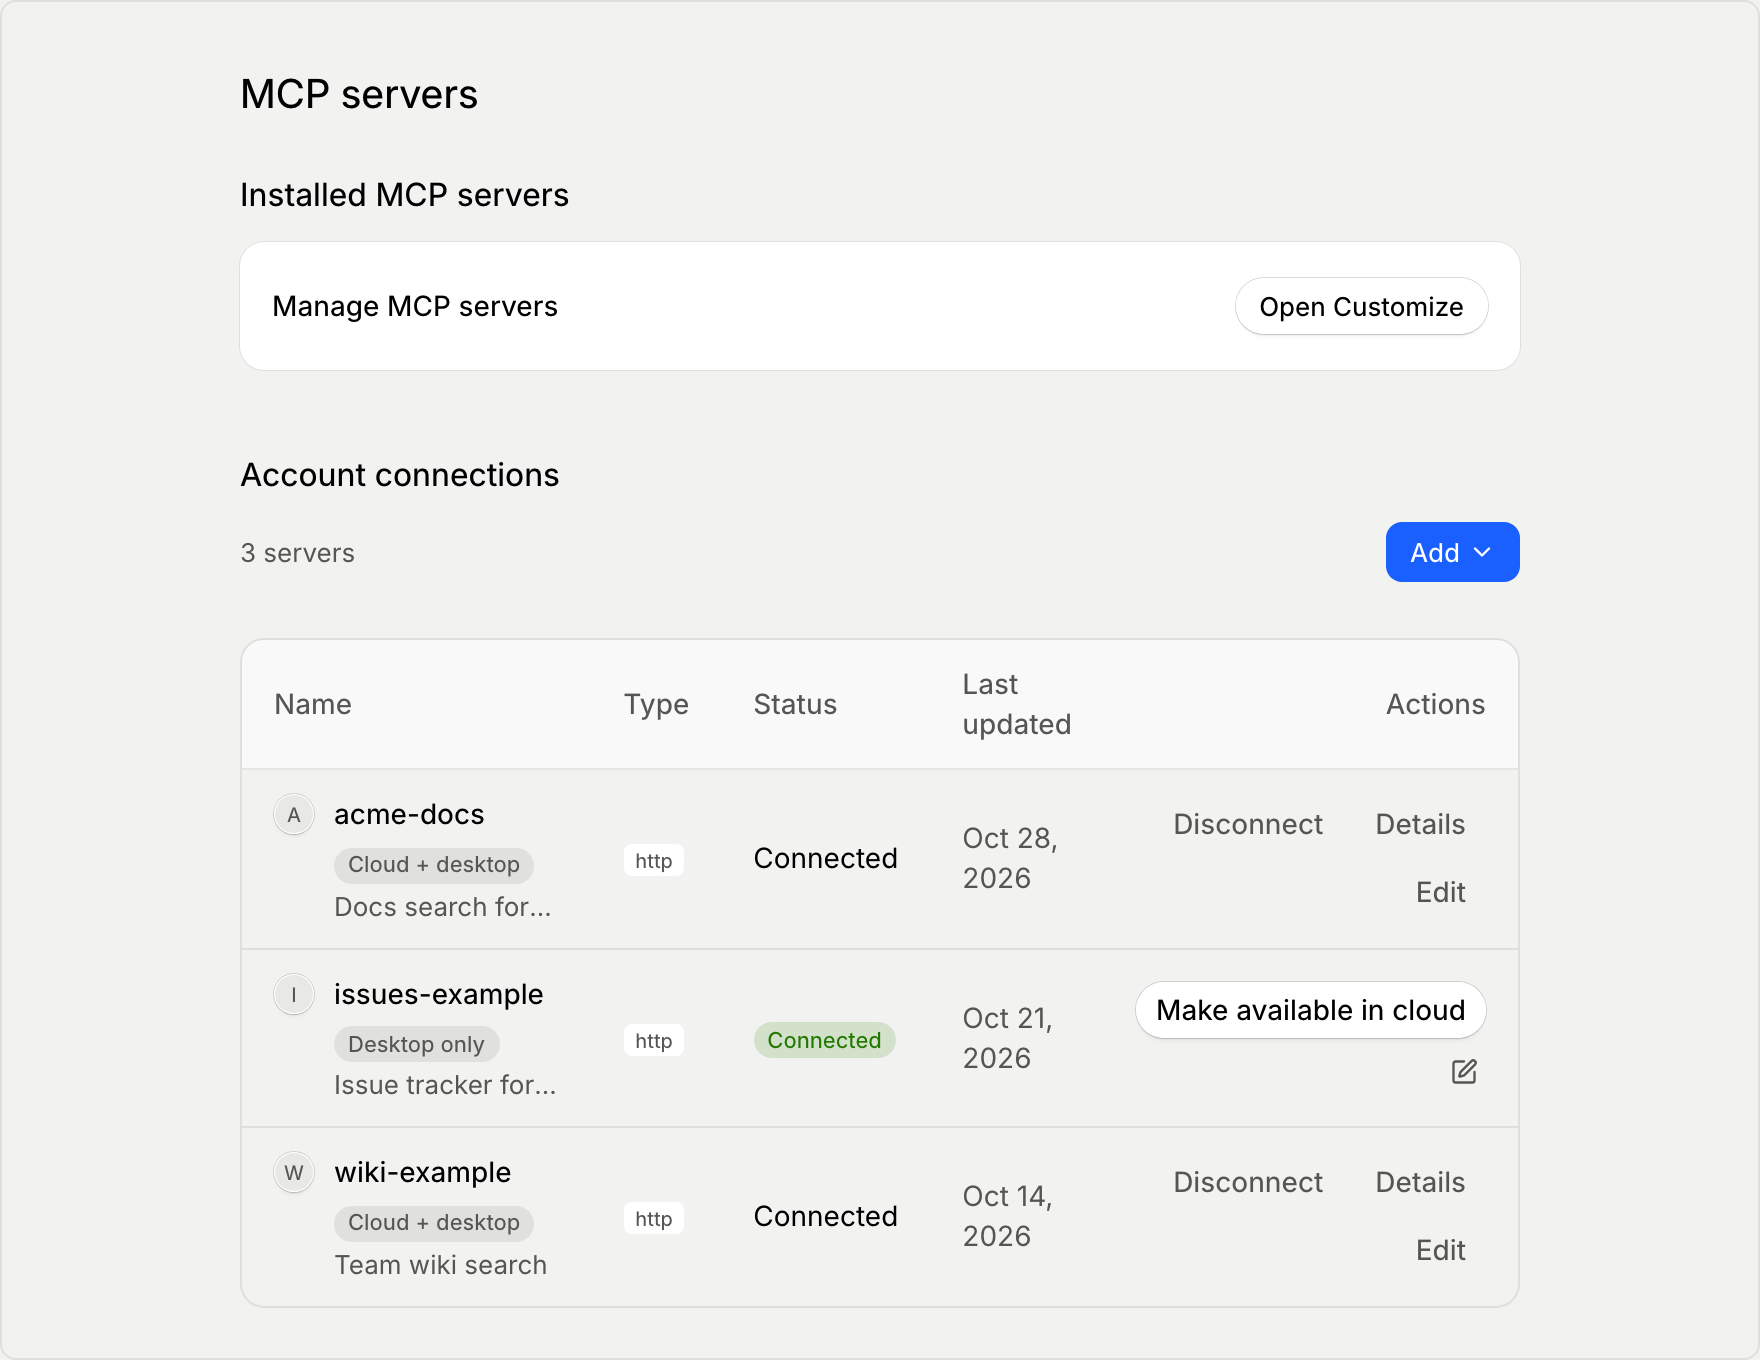
When you're signed in, the MCP servers page in Settings shows Account connections, a table of your servers with their Status. Cloud + desktop means the server is saved to your account, and Desktop only means it runs on this computer. Select Make available in cloud to save a server to your account, or Disconnect to remove that connection.
Check or move a server
Open a server's details in Customize to manage it:
- Health shows its status: Connected, Auth required, Unreachable, or Not checked. Select Test connection to check it again. The time of the last check appears beside it.
- Move to cloud or Move to device changes where the server lives.
- To remove a server you added, choose Remove… from the row's ••• menu, or Delete on its details.
Like other installed items, each server has a status of Active, Available, or Disabled that decides whether new chats load it. A chat can still turn a server off from Plugins in the composer's + menu.